Post by restoring on Mar 15, 2013 6:08:35 GMT -6
My River Raider Hi-Lift Mounting Kit and installation- this is a great option for XJs. It secures the jack inside the vehicle, protecting it from the elements and theft.
Typical condition for a UPS package.

Kit came with two brackets, Hi-Lift mounting Bolts, vague instructions, and a sticker.

The mounting brackets fit between these brackets and the interior trim.
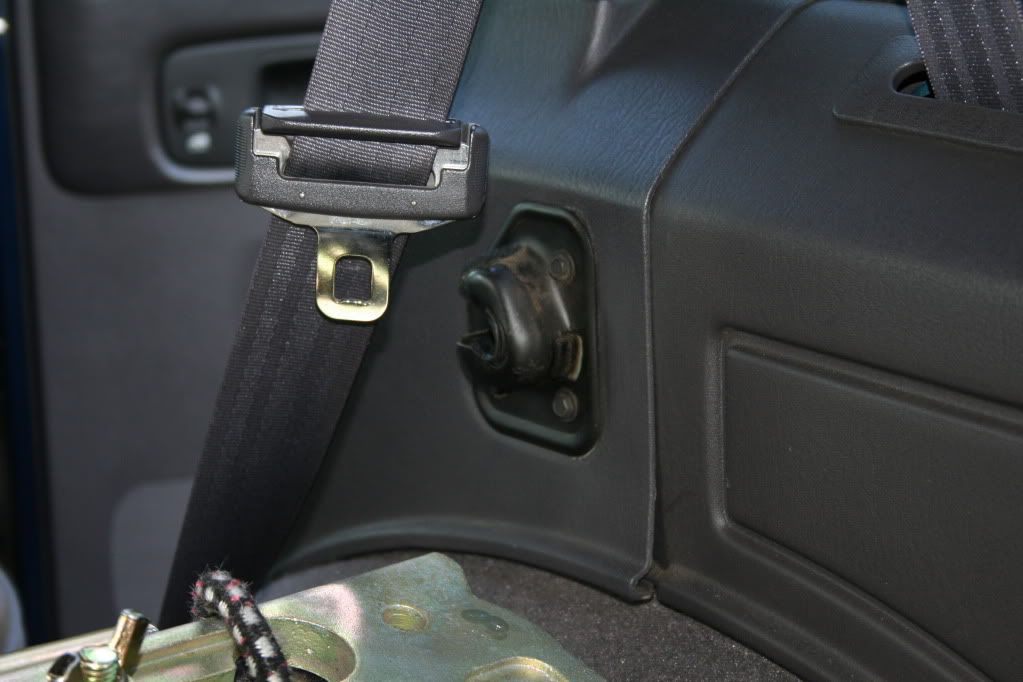
The XJ brackets that secure the rear seat back in the up-right position have a rubber insert. Don't lose it. It only fits back in one way.

Passenger side bracket mounted. The pre-drilled holes in the River Raider brackets line up with the mounting bolts for the seat brackets.

Driver side seat bracket removed.

Put the seat bracket bolts someplace safe so you don't lose them. The rear door is handy and works.

You can see the holes in the River Raider bracket lined up with the holes in the XJ seat bracket.

When those holes are lined up, they will only install in the correct orientation.

Snug the bolts to get the bracket mounted flush, then tighten.

These are the bolts that come with the River Raider brackets to mount the Hi-Lift to the brackets. The two short bolts secure the base of the jack to the brackets.

The long bolt secures the top end of the jack to the brackets.

The long bolt is the same size as the bolt that come with the Hi-Lift for holding that L shaped piece to the top of the Xtreme model, but they are not interchangeable.

Secure the base of the jack to the River Raider bracket first, using the two short bolts, washers, and wingnuts.

Then line up the top of the jack and secure it with the long bolt, washers, and wingnut.

My BFG KM2 33x10.5 still fits under the Hi-lift, but a wider tire will not.

I wrapped some rubber material around the jack handle to minimize rattle since I don't have a handle isolator yet.

DONE! My little base cannon still fits!

Typical condition for a UPS package.

Kit came with two brackets, Hi-Lift mounting Bolts, vague instructions, and a sticker.

The mounting brackets fit between these brackets and the interior trim.

The XJ brackets that secure the rear seat back in the up-right position have a rubber insert. Don't lose it. It only fits back in one way.

Passenger side bracket mounted. The pre-drilled holes in the River Raider brackets line up with the mounting bolts for the seat brackets.

Driver side seat bracket removed.

Put the seat bracket bolts someplace safe so you don't lose them. The rear door is handy and works.

You can see the holes in the River Raider bracket lined up with the holes in the XJ seat bracket.

When those holes are lined up, they will only install in the correct orientation.

Snug the bolts to get the bracket mounted flush, then tighten.

These are the bolts that come with the River Raider brackets to mount the Hi-Lift to the brackets. The two short bolts secure the base of the jack to the brackets.

The long bolt secures the top end of the jack to the brackets.

The long bolt is the same size as the bolt that come with the Hi-Lift for holding that L shaped piece to the top of the Xtreme model, but they are not interchangeable.

Secure the base of the jack to the River Raider bracket first, using the two short bolts, washers, and wingnuts.

Then line up the top of the jack and secure it with the long bolt, washers, and wingnut.

My BFG KM2 33x10.5 still fits under the Hi-lift, but a wider tire will not.

I wrapped some rubber material around the jack handle to minimize rattle since I don't have a handle isolator yet.

DONE! My little base cannon still fits!











 Just remember...we give them back in 10 months


